You can clear your bash history like this:
#cat /dev/null > ~/.bash_history && history -c && exit or
#cat /dev/null > ~/.bash_history erases the content of the ~/.bash_history file.
history -c clears the current terminal history.
You can clear your bash history like this:
#cat /dev/null > ~/.bash_history && history -c && exit or
#cat /dev/null > ~/.bash_history erases the content of the ~/.bash_history file.
history -c clears the current terminal history.
First, you need to log in SSH or Putty to your server
then use command passwd to change the password. below example is changed the root password for a Centos:
[root @ VM ~]# passwd (Changing password for user root.)
New password: (You should type your new password here)
Retype new password: (You should retype your new password again)
[root @ VM ~]# all authentication tokens updated successfully. (Your password change successfully)
Creating a Minecraft server is easy. Login to your new CentOS 7 1GB RAM VPS Server at Vultr and install Java 1.6.0 Open JDK.
ssh [email protected]
[root@vultr ~]# yum install java-1.6.0-openjdk
<some output here>
Is this ok [y/N]: y
Open the Minecraft server port in firewalld.
firewall-cmd --zone=public --permanent --add-port=25565/tcp
firewall-cmd --reload
Make a user run your Minecraft server under. This is for security purposes as it is not good practice to run a Minecraft server as root.
adduser mcuser
#set a secure password.
passwd mcpassword
#this allows you to run screen while su'd from root for the next step
chown mcserver `tty`
Now lets change users and install Minecraft! Change the wget URL accordingly for newer versions of Minecraft.
su - mcuser
mkdir minecraft
cd minecraft
wget -O minecraft_server.jar https://launcher.mojang.com/v1/objects/1b557e7b033b583cd9f66746b7a9ab1ec1673ced/server.jar
chmod +x minecraft_server.jar
screen
echo "eula=true" > eula.txt
#start your Minecraft Server
java -Xmx5376M -Xms5376M -jar minecraft_server.jar nogui
Congratulations, your Minecraft server is now up and running on your high-performance SSD VPS server!
To install on a 768MB VPS follow the same commands above but change the last java command to:
java -Xmx3840M -Xms3840M -jar minecraft_server.jar nogui
If you require more players (and thus more RAM) you just launch a larger instance and then simply subtract 256M from the amount of RAM your instance has allocated. For example, a 4096 instance would launch with -XmX3840M -Xms3840M.
#add user Type
whitelist add “USERNAME”
You need to pass the following options:
rm -rf dir1
rm -rf /path/to/dir/
rm -rf /home/vivek/oldschoolpics/
rm filename
OR
unlink filename

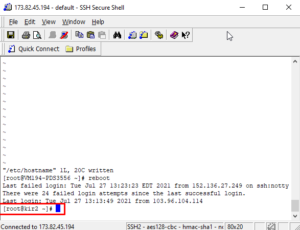
Stapes 1: # vi /etc/hostname
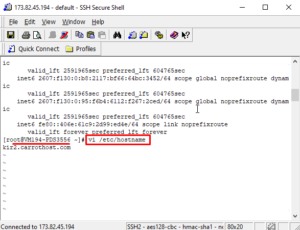
Stapes 2: press i button
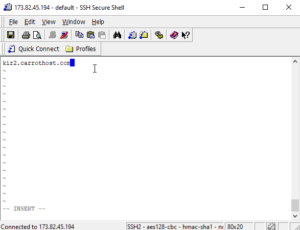
Stapes 3: Overtight if existing or type your hostname like kir2.carrothost.com
after that press the Esc button and type wq! press Enter